LightScribe Technology Guide Table of contents
LightScribe is an innovative piece of technology that allows for the direct labeling of optical discs. More specifically, LightScribe burns any image or text onto the surface of CDs or DVDs without the use of adhesive labels, paint, or ink.
How does LightScribe work? LightScribe technology involves a laser imaging process that burn labels onto the surface of optical discs. The laser imaging process initiates a chemical change in the disc coating, and no hazardous chemicals are emitted during the process, making it quite safe to use. Discs burnt with LightScribe technology can be read in optical drives that do not feature LightScribe support.
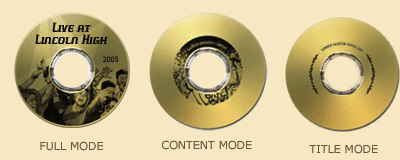
Full mode: Creates a full-disc image What is needed for LightScribe? The utilization of LightScribe technology requires three essential components: LightScribe hardware, LightScribe software and LightScribe media. LightScribe hardware Refers to LightScribe-enabled burners. Currently almost all LightScribe-enabled burners are DVD burners. LightScribe software Includes LightScribe system software and a LightScribe labeling application. These typically come bundled with a LightScribe burner. LightScribe media LightScribe media available currently include CD-R, DVD-R and DVD+R format discs. Expect more disc formats to be added in future. Using LightScribe to label your discs Before burning labels to LightScribe-enabled discs, make sure that all required hardware and software are properly installed. The creation process is not at all difficult and can be completed in just 4 easy steps: Step 1: Eject the driver tray and insert a LightScribe-enabled disc into the drive label-side down. Step 2: Design a label using the labeling application. Step 3: Click "Print" in the application to burn the label. Step 4: After the label is burnt, take the disc out of the driver tray and your very own LightScribe labeled CD or DVD is complete! |


Who We Are
Who We Serve
Customer Service
B2B Marketplace
Newegg Logistics
© 2000-2026 Newegg Business Inc. All rights reserved.
Policy & Agreement | Privacy Policy | CA Transparency in Supply Chains Act | Cookie Preferences